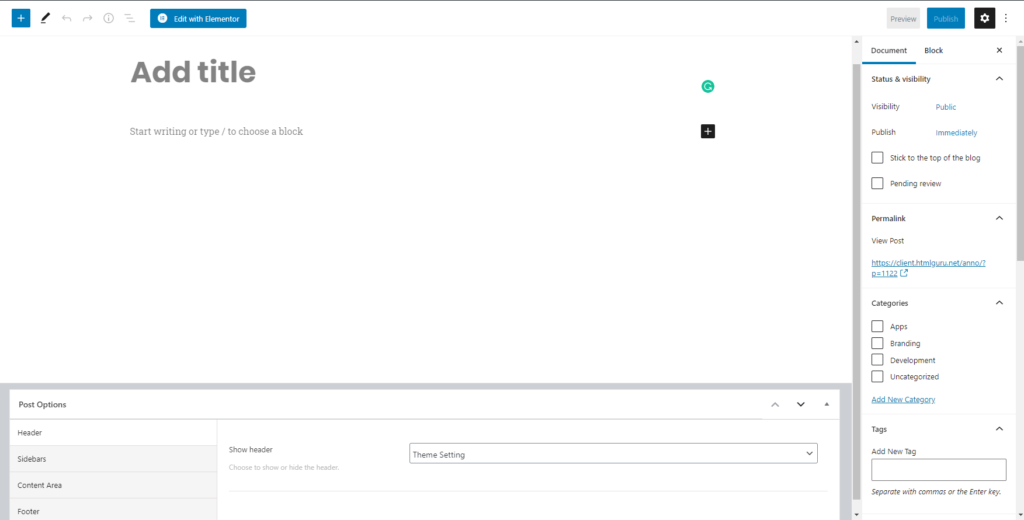
- All of your blog posts are made in the Posts section of your WordPress admin. Click on Posts to open the section.
- At the top of the posts page, click on Add New to make a new post. Create a title and insert your post content in the editing field
- On the right-hand side document tab of the post page is the Categories box. To make a new Category, click + Add New Category and give it a name. You can have as many as you want. To apply a Category to a post, simply check the box next to the Category name.
- You can also apply Tags to a post. The Tag box is below the Category box. Simply insert your tags, separate multiple tags with commas
- To set a Featured Image. Click the Featured Image box and select an image from the media window and click Use As Featured Image
- You can also change the permalink from permalink fields
- Once you have everything you want to be selected, click Publish and your post will show up on your blog page
Post-Metabox
Post meta box menu – Post meta box work on blog single post only. It basically includes extra customization for post single posts
- Header: You can disable post header from here.
- Sidebars: if you want to control sidebar on the specific post then you can manage it from here. here we include sidebar left, right and full width.
- Content Area: At the content area, we included a control for single post spacing top and bottom. you can reduce and increase spacing on this area
- Footer: At footer block, you can enable and disable footer at single post page area


Leave A Comment?